Did your Instant Pot say Burn? Got the dreaded Instant Pot Burn Message (Instant Pot Burn Notice) on the display screen?
Instant Pot Burn Message is one of the most common errors new users run into.
First, don’t panic!
Instant Pot Burn Guide:
In this Instant Pot Burn guide, we’ll go through what does it mean when instant pot says burn, 7 reasons why your instant pot says burn, and what to do when Instant Pot says burn.
- 1. What is Instant Pot Burn Message?
- 2. Why Does My Instant Pot Says Burn?
- 3. What to Do When Instant Pot Says Burn?
*Note: We’ve been hearing & seeing some new Instant Pots triggering the Burn Message even when users didn’t make any of the mistakes below. This has even happened to some experienced Instant Pot users who were using their usual tried & true recipes in their newly purchased Instant Pots. We have yet to confirm with the Instant Pot Company if they have made adjustments to their newest Instant Pots.
1. What is Instant Pot Burn Message?
The Burn Message on Instant Pot simply means there’s an Instant Pot Overheat Error.
Instant Pot has a built-in “burn-protection” mechanism that prevents users from burning food in the Instant Pot.
So, when it detects a high temperature (140°C or 284°F) at the bottom of the inner pot, the “burn-protection” mechanism suspends heating. This often means the bottom layer is overcooked and getting dry.
This is when you would see the “Burn” Message or “Ovht” Error on the screen display.
2. Why Does My Instant Pot Says Burn?
The challenge with using Instant Pot is that food sits at the bottom of the pot and you can’t stir the food as it builds up pressure. Therefore, there are rules to follow to prevent you from burning food in Instant Pot!
Here are the 7 common reasons that trigger the Instant Pot Burn Message:
- Not enough liquid in the Instant Pot.
- The liquid in Instant Pot is too thick.
- Pressure cook cream of milk directly in the Instant Pot.
- Did not deglaze the bottom of the inner pot.
- Forgot to turn the venting knob to sealing position.
- Steam is leaking from the silicone sealing ring.
- Objects are stuck under the inner pot above the heating element.
7 Common Mistakes Causing Instant Pot Burn
Mistake #1: Not Enough Liquid in Instant Pot
When there’s not enough thin cooking liquid in the Instant Pot, it may not be able to generate enough steam to come up to pressure. The bottom of the pot will become too hot, thus triggering the “Burn” code.
*Pro Tip: This issue happens more often when cooking very high starch content (i.e. beans, rice).
Solutions:
#1. Use Minimum 1 Cup of Total Liquid
Unless the tested recipe stated otherwise, we recommend new users to use 1 cup of total liquid until they get comfortable cooking with the pressure cooker.
#2. Use Tested Recipes
Follow our Tested Instant Pot Recipes with tried & true Liquid Ratios & Pressure Cooking Time until you’re comfortable creating your own.
Mistake #2: Liquid in Instant Pot is Too Thick
If your cooking liquid is too thick to come up to a boil, heat will build up at the bottom before the top starts to boil. Your pot may not be able to get up to pressure & triggers the Burn message.
Solutions:
#1. Have Enough Thin Cooking Liquid
Make sure you have thin liquid at the bottom of the inner pot.
#2. Do Not Mix Thick Sauces
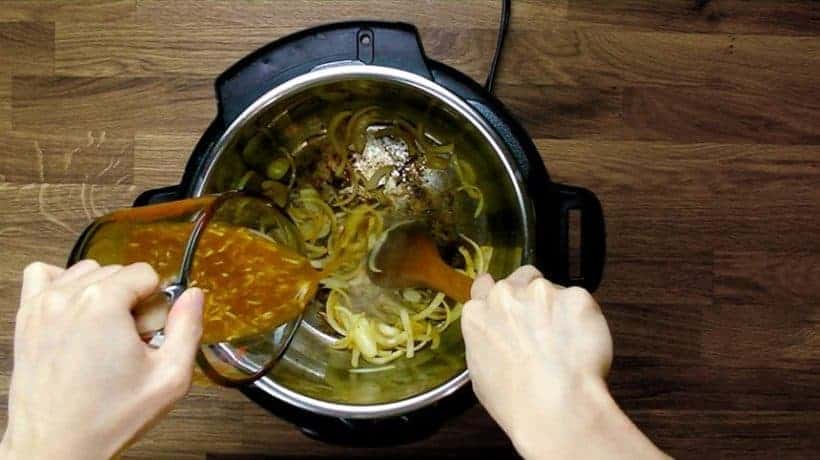
Do NOT mix in the thick, saucy ingredients such as tomato paste or tomato sauce with other ingredients. Simply layer the thick sauce on top of the other ingredients.
Example:
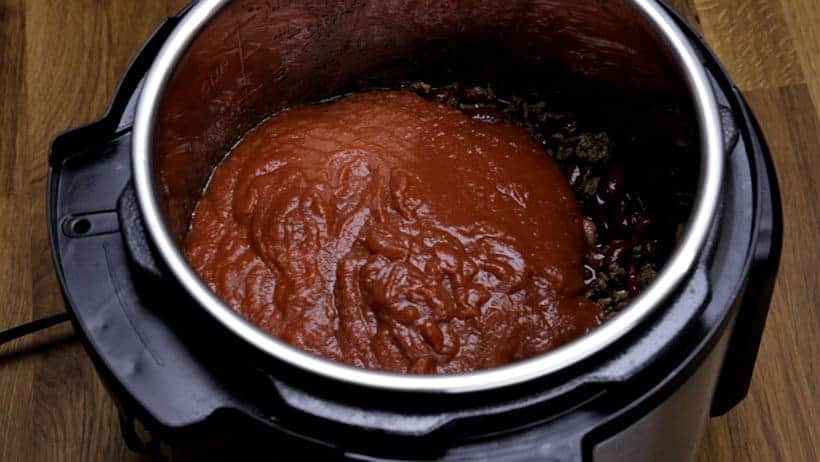
In our Instant Pot Chili Recipe, we have chicken stock mixture & other ingredients at the bottom of the pot. Then, we pour the crushed tomatoes right on top of the other ingredients.
As shown in below photo, we just let them sit on top, then proceed to close lid & start pressure cooking. No mixing involved.
#3. Add Thickener After Pressure Cooking Cycle
Always add thickener such as cornstarch, flour, arrowroot, or potato starch after the pressure cooking cycle. Keep in mind there are some exceptions when only a very small amount is used.
Example: In our Instant Pot Umami Pot Roast Recipe, we thicken the gravy with cornstarch mixture at the final step after pressure cooking.
Mistake #3: Pressure Cook Cream or Milk Directly in Instant Pot
Some food such as cream or milk scald easily in the Instant Pot. They will create a film at the bottom that will overheat the inner pot.
Solutions:
Do NOT add cream or milk directly in the inner pot before pressure cooking. There are 2 workarounds for recipes with cream or milk.
#1. Add Cream or Milk After Pressure Cooking
Example: In our Instant Pot Tomato Soup Recipe, we added the heavy cream after pressure cooking, blending, and straining the soup (as shown in below photo).

#2. Use Pot-in-Pot Method
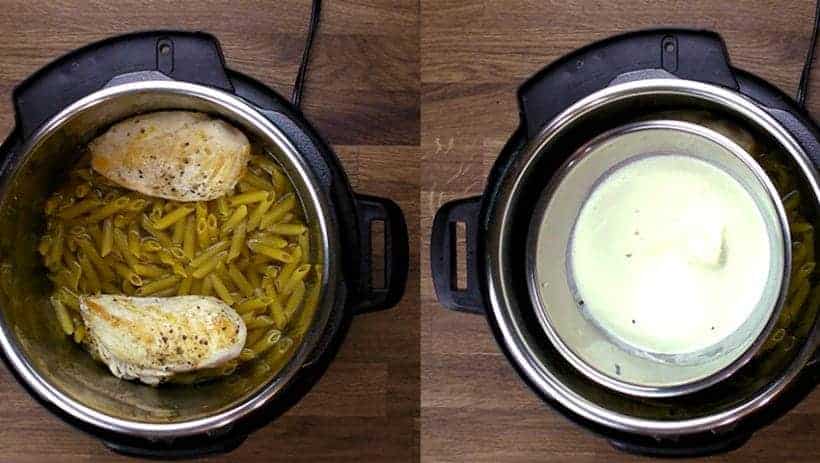
Example: In our Instant Pot Spinach Chicken Alfredo Pasta Recipe, we prevent the risk of scorching by cooking the homemade Alfredo Sauce (includes heavy cream & grated cheese) separately in a smaller stainless steel pot on top of the pasta (as shown in below photo).
Mistake #4: Did Not Deglaze Inner Pot Bottom
Instant Pot is awesome for allowing users to saute directly in the inner pot.
Take note that after sauteing, there will be some brown bits stuck to the the bottom of the pot. Don’t worry! These are not burnt food debris.
However, when users don’t fully scrub these flavorful brown bits off the pot before pressure cooking, it’ll trigger Instant Pot to think the food content inside is burnt.
Solution:
After sauteing, be sure to fully deglaze the pot bottom by pouring some thin cooking liquid (e.g. broth) then scrub the flavorful brown bits off with a wooden spoon (as shown in photo below). You don’t need to discard the flavorful brown bits.
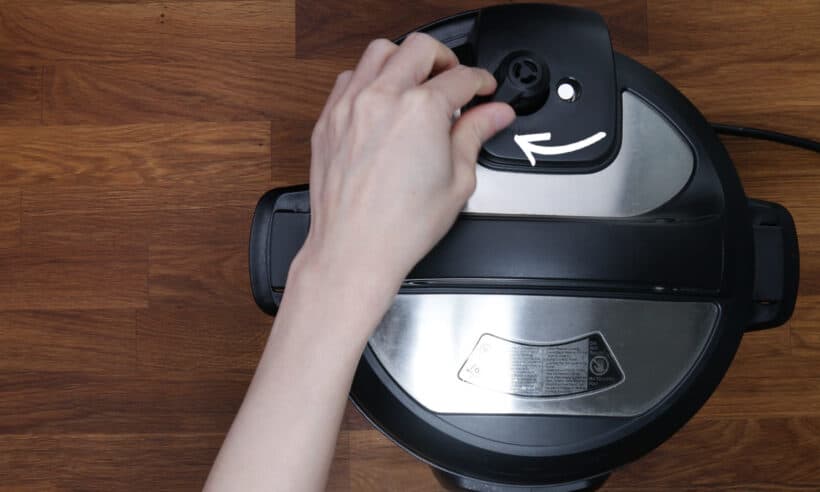
Mistake #5: Forgot to Turn Venting Knob to Sealing Position
Forgetting to seal the pot is a common rookie mistake.
When the Instant Pot isn’t completely sealed, more liquid than necessary will escape from the pot as steam. Therefore, there won’t be enough liquid in the pot – results in the same situation as Mistake #1 above.
Solution:
Make it a habit to turn the Venting Knob to Sealing Position every time you start pressure cooking. Don’t walk away until you made sure the Floating Valve has popped up.
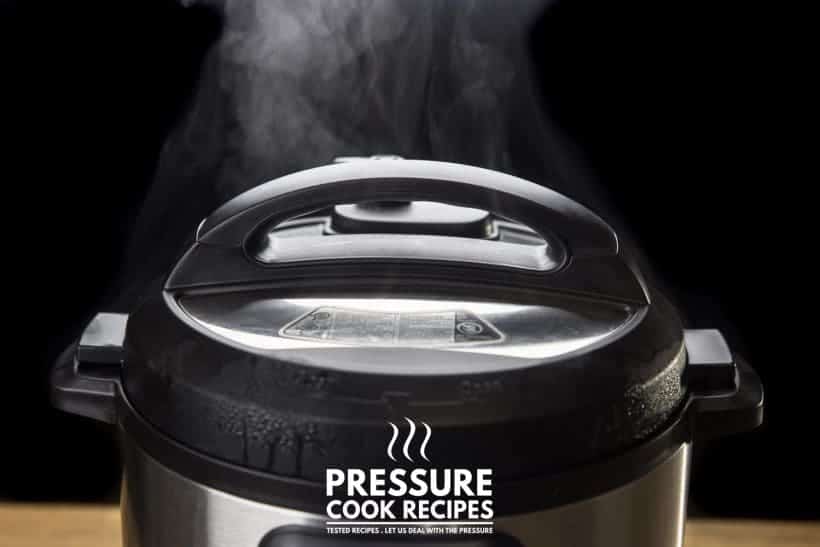
Mistake #6: Steam is Leaking From Silicone Sealing Ring
When steam is leaking like below photo, it means the Instant Pot isn’t properly sealed.
Similar situation as Mistake #5 above – more liquid than necessary escaped from the pot as steam, so there was not enough liquid in the pot.
4 Common Causes for Leaking Steam From Sealing Ring:
- Forgot to place sealing ring back into the lid
- Sealing ring is damaged, cracked
- Food debris attached to the sealing ring
- Lid was not closed properly
*Pro Tip: Same issue can happen with the Floating Valve – if steam leaks for over 2 mins, check the Floating Valve & its’ silicone seal for food debris, damages, or if the silicone seal is seated properly.
Solution:
Make it a habit to ensure the sealing ring is properly installed, check for damages or debris every time before you close the lid for pressure cooking.
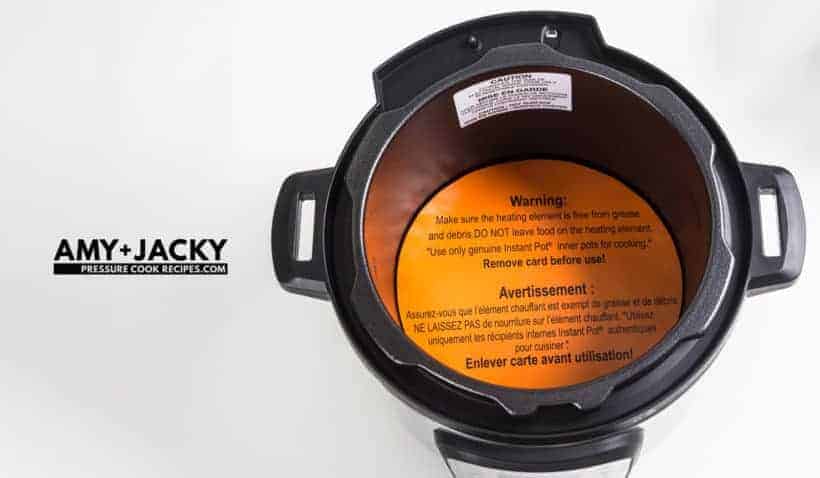
Mistake #7: Objects Stuck Under Inner Pot Above Heating Element
Things get chaotic in the kitchen. Sometimes unwanted food, liquid, or things can get on the heating element without you knowing.
When you unknowingly place the inner pot on top and start cooking, the objects will burn.
We don’t have any photos to show you the aftermath, but yes…sadly we’ve seen fellow users’ share their photos of toys & kids socks stuck melted on the heating element. 🙁
Solution:
Always check to make sure the heating element is clear of objects, and wipe dry the inner pot’s exterior before placing it inside the Instant Pot Housing.
3. What to do when Instant Pot says Burn?
Here are 6 steps to follow when your Instant Pot says Burn:
- Release pressure in Instant Pot (don’t force open the lid).
- After releasing the pressure, carefully open Instant Pot’s lid.
- Check the bottom of the pot & remove any burnt food content in the Instant Pot.
- Check if there’s anything stuck on Instant Pot’s heating element.
- Check if the silicone ring, venting knob, and floating valve are obstructed or defective.
- Restart the pressure cooking process.
1. Release Pressure in Instant Pot
If your pot is under pressure, first release the pressure in the pot.
*NEVER EVER force open the lid.
2. Carefully Open Instant Pot’s Lid
After releasing all the pressure in Instant Pot, the pin will drop. Then, carefully open the lid.
*Pro Tip: If the pot contains very thick sauce, wait a few more minutes before opening the lid.
3. Check Pot Bottom & Remove Burnt Content
Check if there’s anything stuck to the bottom of the inner pot.
- Minor Burnt Food: If there’s only a little bit of food stuck to the bottom, use a wooden spoon to scrub it all off.
- Major Burnt Food: If there’s blackened burnt food stuck to the bottom, first remove all food content, then soak the inner pot with soapy water & scrub.
*Pro Tip: If the burnt food is difficult to remove, you can try Pressure Cooking water with vinegar, Natural Release, then scrub some more. *This is when an extra inner pot comes in handy.
4. Check Heating Element
If there’s nothing stuck to the pot bottom, check if there’s anything stuck between the inner pot and heating element (Instant Pot housing).
5. Check Silicone Ring, Venting Knob, Floating Valve
Check if silicone ring, venting knob, valve is defective, installed properly, or if anything is obstructed.
6. Restart Pressure Cooking Process
Place ingredients back into the cleaned & dried inner pot. Dilute the cooking liquid until consistency is thin. Resume the pressure cooking & adjust the pressure cooking time accordingly.
*Pro Tip: For reference – add 1 – 2 cups of thin cooking liquid – please adjust this amount accordingly to the type of food you’re cooking & the burnt situation.
D. Still Have Instant Pot Burn Questions?
If you’re still unsure why you had the Instant Pot Burn Message, need help, or have thoughts to add, let’s chat in the comments below. 🙂
Read More: 10 Common Mistakes You Can Avoid as New Instant Pot User
All Our Pressure Cooker Recipes
*Disclosure: We are an Amazon Influencer/Amazon Associate. This means that if you decide to purchase items or services on Amazon through our links on Pressure Cook Recipes to Amazon, Amazon will send a small commission to us at no additional costs to you. Thank you!